Pages

Showing posts with label makeup brushes. Show all posts

Thursday, 17 April 2014

Beauty Tip Thursday - How I Wash My Makeup Brushes!

While looking back at my many posts I came to the realization I have somehow never blogged about how I go about washing my makeup brushes. This is a pretty important chore any makeup lover should have in their weekly regime so today is the day I tell you all how I get my brushes fresh and clean!

I try to do this process about once a week/week and a half (depending on how much I used my brushes), usually on the weekend I find the time to do this. 


Here you have the dreaded before shot, pretty gross. These are the brushes I use all the time which I keep in my bathroom where I do my makeup. They're a mix of Real Techniques, Urban Decay, Elf, Ecotools, Coastal Scents and Quo. 


I use olive oil and baby shampoo for my two step cleaning process. The only other thing you need is a small bowl to put the oil in and some luke warm water from your tap! 

I begin by dipping my brushes lightly into the oil and swishing them around slightly - you'll instantly see the color beginning to come out of the dirty brush. I then give it a light rinse under some running water, and gently squeeze the bristles to get the majority of the oil out. The oil is amazing in particular for brushes with white tips, and eyeliner brushes, especially those you use with a gel liner. 

Next, I take the baby shampoo (you can use any brand you like, this is just what I use on my daughters), place some in the palm of my hand and swish the brush around to remove any oil residue and left over makeup. If it's an especially dirt brush or I feel it still has oil remaining in it I will do a second round of shampoo before squeezing out the excess water. 


Finally I take the freshly washed brushes and place them on a folded hand towel, allowing the bristles to hang off the end so they can properly air dry. 

And there you have it, fresh and clean makeup brushes!

I hope this post was helpful to some of you!

Friday, 5 October 2012

Makeup Collection and Storage!

My makeup collection/storage has been a very requested video indeed, ever since I began doing Youtube videos. I finally decided to clean up my act and film this, and I'm actually super glad I did. 

As I mentioned in the video, I am not trying to brag/flaunt what I have, I did this video to respond to peoples requests, and lets face it, I'm a huge sucker for these types of videos, I love watching them myself! 


Both storage drawers I use, as well as the drawer dividers are from Walmart, and even if you can't get the exact same thing, I'm certain you can find something very similar. Also, the brown basket I store some of my lip glosses in is from a dollar store! 

Until next time! 

xo, Hannah

DIY - Glitter Makeup Brush Holder

I love Youtube for many reasons, but a huge one is the amazing inspirational ideas you can obtain from watching videos. There are SO many creative and thoughtful people out there! 
I credit this tutorial to Missglamorazzi, you can watch her video tutorial version here!


You will need!
A used up candle (I'm using a Slatkin & Co. candle but any candle would do!) 
Mod Podge in either a matte or gloss finish
Glitter in the color of your choice
A craft brush
Some nail polish remover
A couple of cotton pads 
Dish Soap 
A knife 
(Oh and don't forget, something to cover your work area.. unless you want glue and glitter everywhere!) 


Step 1
Place your used up candle in the freezer for at least 30 minutes, this will make the remaining wax easier to remove. 
Once the time has elapsed, pull your candle out and grab your knife. Press the knife in and twist slightly in several areas in the wax to break the wax into smaller more workable pieces so it will be easier scoop out. See image bellow.


Step 2 
Once the wax has all been removed there is still going to be residue from the glue that was holding the wicks in place. Grab your cotton pad and some nail polish remover and rub the sticky areas, the nail polish should bring the glue up easily. 
Follow up by giving the container a good wash with some hot soapy water - this should help when you get to the next step as well. 


Step 3
You can then use your knife to peel up the labels on both the front and bottom of the container. You can follow up by rubbing these areas with a little more nail polish remover to get any remaining glue residue from the surface. 
Follow up with one final good wash with warm soapy water.  


Step 4
Grab your paint brush and Mod Podge and paint the inside of your container with a thin even coating. 


Step 5
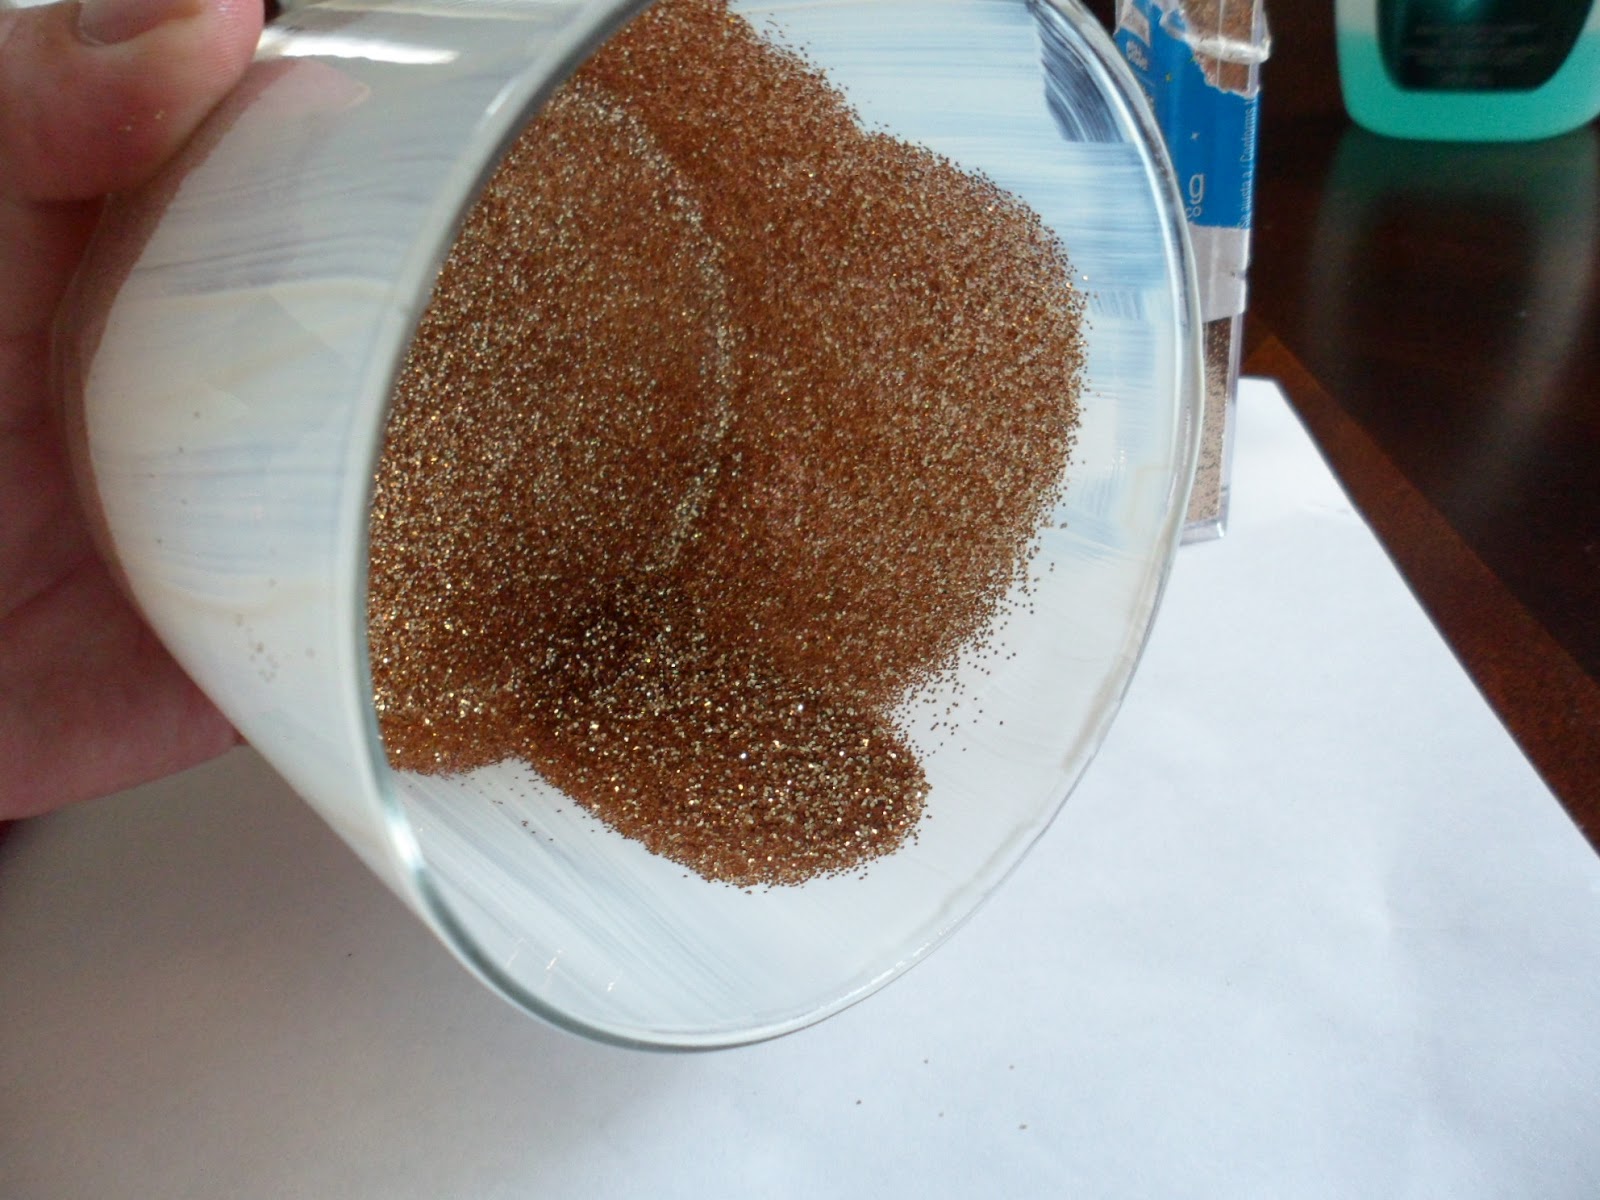
While working over the paper you layed out, dump your glitter (a generous amount) into the container and begin shaking/rotating the container to coat the inside thoroughly. 
Once you feel you have the interior well coated with your glitter, let sit for at least 2 hours so that the glue has had sufficient time to dry. 
Finally, turn the container upside down and tap out any excess glitter before putting your brushes (or whatever else you decide) into your new, sparkly container! 


And there you have it! 
The perfect way to use up any old candles you have laying around, without a clue what to do with! 


I hope you enjoyed this DIY! I love doing crafty things so let me know if you'd like to see more posts like this one! 

Until next time!

xo, Hannah