I love Youtube for many reasons, but a huge one is the amazing inspirational ideas you can obtain from watching videos. There are SO many creative and thoughtful people out there!
I credit this tutorial to Missglamorazzi, you can watch her video tutorial version here!
You will need!
I credit this tutorial to Missglamorazzi, you can watch her video tutorial version here!
You will need!
A used up candle (I'm using a Slatkin & Co. candle but any candle would do!)
Mod Podge in either a matte or gloss finish
Glitter in the color of your choice
A craft brush
Some nail polish remover
A couple of cotton pads
Dish Soap
A knife
(Oh and don't forget, something to cover your work area.. unless you want glue and glitter everywhere!)
Step 1
Place your used up candle in the freezer for at least 30 minutes, this will make the remaining wax easier to remove.
Once the time has elapsed, pull your candle out and grab your knife. Press the knife in and twist slightly in several areas in the wax to break the wax into smaller more workable pieces so it will be easier scoop out. See image bellow.
Step 3
You can then use your knife to peel up the labels on both the front and bottom of the container. You can follow up by rubbing these areas with a little more nail polish remover to get any remaining glue residue from the surface.
Follow up with one final good wash with warm soapy water.
I hope you enjoyed this DIY! I love doing crafty things so let me know if you'd like to see more posts like this one!
Until next time!
xo, Hannah
Step 1
Place your used up candle in the freezer for at least 30 minutes, this will make the remaining wax easier to remove.
Once the time has elapsed, pull your candle out and grab your knife. Press the knife in and twist slightly in several areas in the wax to break the wax into smaller more workable pieces so it will be easier scoop out. See image bellow.
Step 2
Once the wax has all been removed there is still going to be residue from the glue that was holding the wicks in place. Grab your cotton pad and some nail polish remover and rub the sticky areas, the nail polish should bring the glue up easily.
Follow up by giving the container a good wash with some hot soapy water - this should help when you get to the next step as well.
You can then use your knife to peel up the labels on both the front and bottom of the container. You can follow up by rubbing these areas with a little more nail polish remover to get any remaining glue residue from the surface.
Follow up with one final good wash with warm soapy water.
Step 4
Grab your paint brush and Mod Podge and paint the inside of your container with a thin even coating.
Step 5
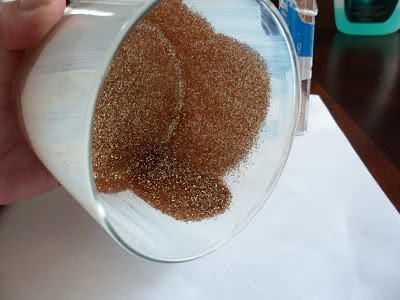
While working over the paper you layed out, dump your glitter (a generous amount) into the container and begin shaking/rotating the container to coat the inside thoroughly.
Once you feel you have the interior well coated with your glitter, let sit for at least 2 hours so that the glue has had sufficient time to dry.
Finally, turn the container upside down and tap out any excess glitter before putting your brushes (or whatever else you decide) into your new, sparkly container!
And there you have it!
The perfect way to use up any old candles you have laying around, without a clue what to do with!
Until next time!
xo, Hannah


Pretty cool DIY
ReplyDeleteWill try this :)
this is so cute! great job :)
ReplyDeletevickyhoang.blogspot.com
I was looking for a new make-up brush holder, this is perfect! So cute & original. Thanks for posting.
ReplyDelete- krstyvns.blogspot.com
xo