Pages

Showing posts with label tutorial. Show all posts

Thursday, 17 April 2014

Beauty Tip Thursday - How I Wash My Makeup Brushes!

While looking back at my many posts I came to the realization I have somehow never blogged about how I go about washing my makeup brushes. This is a pretty important chore any makeup lover should have in their weekly regime so today is the day I tell you all how I get my brushes fresh and clean!

I try to do this process about once a week/week and a half (depending on how much I used my brushes), usually on the weekend I find the time to do this. 


Here you have the dreaded before shot, pretty gross. These are the brushes I use all the time which I keep in my bathroom where I do my makeup. They're a mix of Real Techniques, Urban Decay, Elf, Ecotools, Coastal Scents and Quo. 


I use olive oil and baby shampoo for my two step cleaning process. The only other thing you need is a small bowl to put the oil in and some luke warm water from your tap! 

I begin by dipping my brushes lightly into the oil and swishing them around slightly - you'll instantly see the color beginning to come out of the dirty brush. I then give it a light rinse under some running water, and gently squeeze the bristles to get the majority of the oil out. The oil is amazing in particular for brushes with white tips, and eyeliner brushes, especially those you use with a gel liner. 

Next, I take the baby shampoo (you can use any brand you like, this is just what I use on my daughters), place some in the palm of my hand and swish the brush around to remove any oil residue and left over makeup. If it's an especially dirt brush or I feel it still has oil remaining in it I will do a second round of shampoo before squeezing out the excess water. 


Finally I take the freshly washed brushes and place them on a folded hand towel, allowing the bristles to hang off the end so they can properly air dry. 

And there you have it, fresh and clean makeup brushes!

I hope this post was helpful to some of you!

Thursday, 28 June 2012

Burnt Orange FOTD: Tuesday June 26th


Products Used;
Urban Decay Primer Potion - Eden
NYX Jumbo Eye Pencil - Dark Brown
Orange e/s from Coastal Scents 76 Combo Palette 
Mac e/s Soft Brown
Mac e/s Mulch
Urban Decay e/s Dark Horse (Naked 1)
Mac e/s Honey Lust
Urban Decay e/s Virgin (Naked 1)
Loreal Liquid Liner - Brown Topaz
Rimmel Scandal Eyes Mascara


I don't ever do many face of the day posts as I feel I do many of the same looks, can you tell I love neutrals? I am going to make an effort to do better at this though and in doing so, use it as motivation to switch up my mundane routine of simple brown shadows!


xo, Hannah


Wednesday, 13 June 2012

Tutorial!: NOTD Faded Florals


Colors used - (left to right) Essie Blanc, Cute as a Button, Bikini So Teeny and Tart Deco 

You will need!
- A base coat and top coat (I used Revlon Colorstay base and top coat from their newest line of colorstay polishes)
- A white or light colored base 
- Several colors of your choice (I used 3 light summery colors, but you could use more or less, and customize the colors to the time of year you are doing the tutorial!)
- A plate, or something to place your nail polishes on for mixing
- Paint brushes (you will need one for each color, including the white)
- Nail polish remover 


1. Begin by applying your base coat. After allowing time for this to dry begin applying two coats of your light/white polish - you want a nice opaque result so your design will stand out. 

2. Once you have allowed your white base to dry grab you plate and place a dot of each colored polish you have chosen on the plate, leaving room in between each as you will be diluting and working with each color. 

3. Pour your nail polish remover (I just poured mine into the cap of the bottle)

4. Grab a paint brush (be sure not to mix the brushes into the different colors - use only one brush per color), and begin diluting the colored polish with the remover - you are looking to create the consistency of a stain. Just stick to doing this to one color at a time (dilute, then apply.. dilute, then apply.. etc) 

5. You can then begin applying each diluted polish to your nails. Use a stamping motion to create flower shapes, remembering to leave room for the other colors you will be applying. Don't worry about making them perfect, I found the ones that looked least perfect were my favorites in the end. 

6. Continue on with this same process for the rest of the colors you've chosen.

7. You then want to grab your white polish and make a dot on your plate, and then proceed to dilute it as you did the other colors. 

8. Grabbing a clean brush, you will apply the white polish to the center of each of the flowers you've created. If it is diluted enough the polish should run slightly, which adds to the 'faded' effect. 

9. Finally, wait for all the designs to dry well and then add a top coat to finish off the look. 


If you would like to see the tutorial in action, click the video to watch my Youtube tutorial! 


The finished look! 


This look was inspired by thebeautydepartment.com - check them out for tons of great ideas! I am personally addicted to this site right now! 


Hope you all enjoyed this look! Let me know if you would consider trying this look, or if you do, show me how it turned out! 

xo, Hannah

Saturday, 12 May 2012

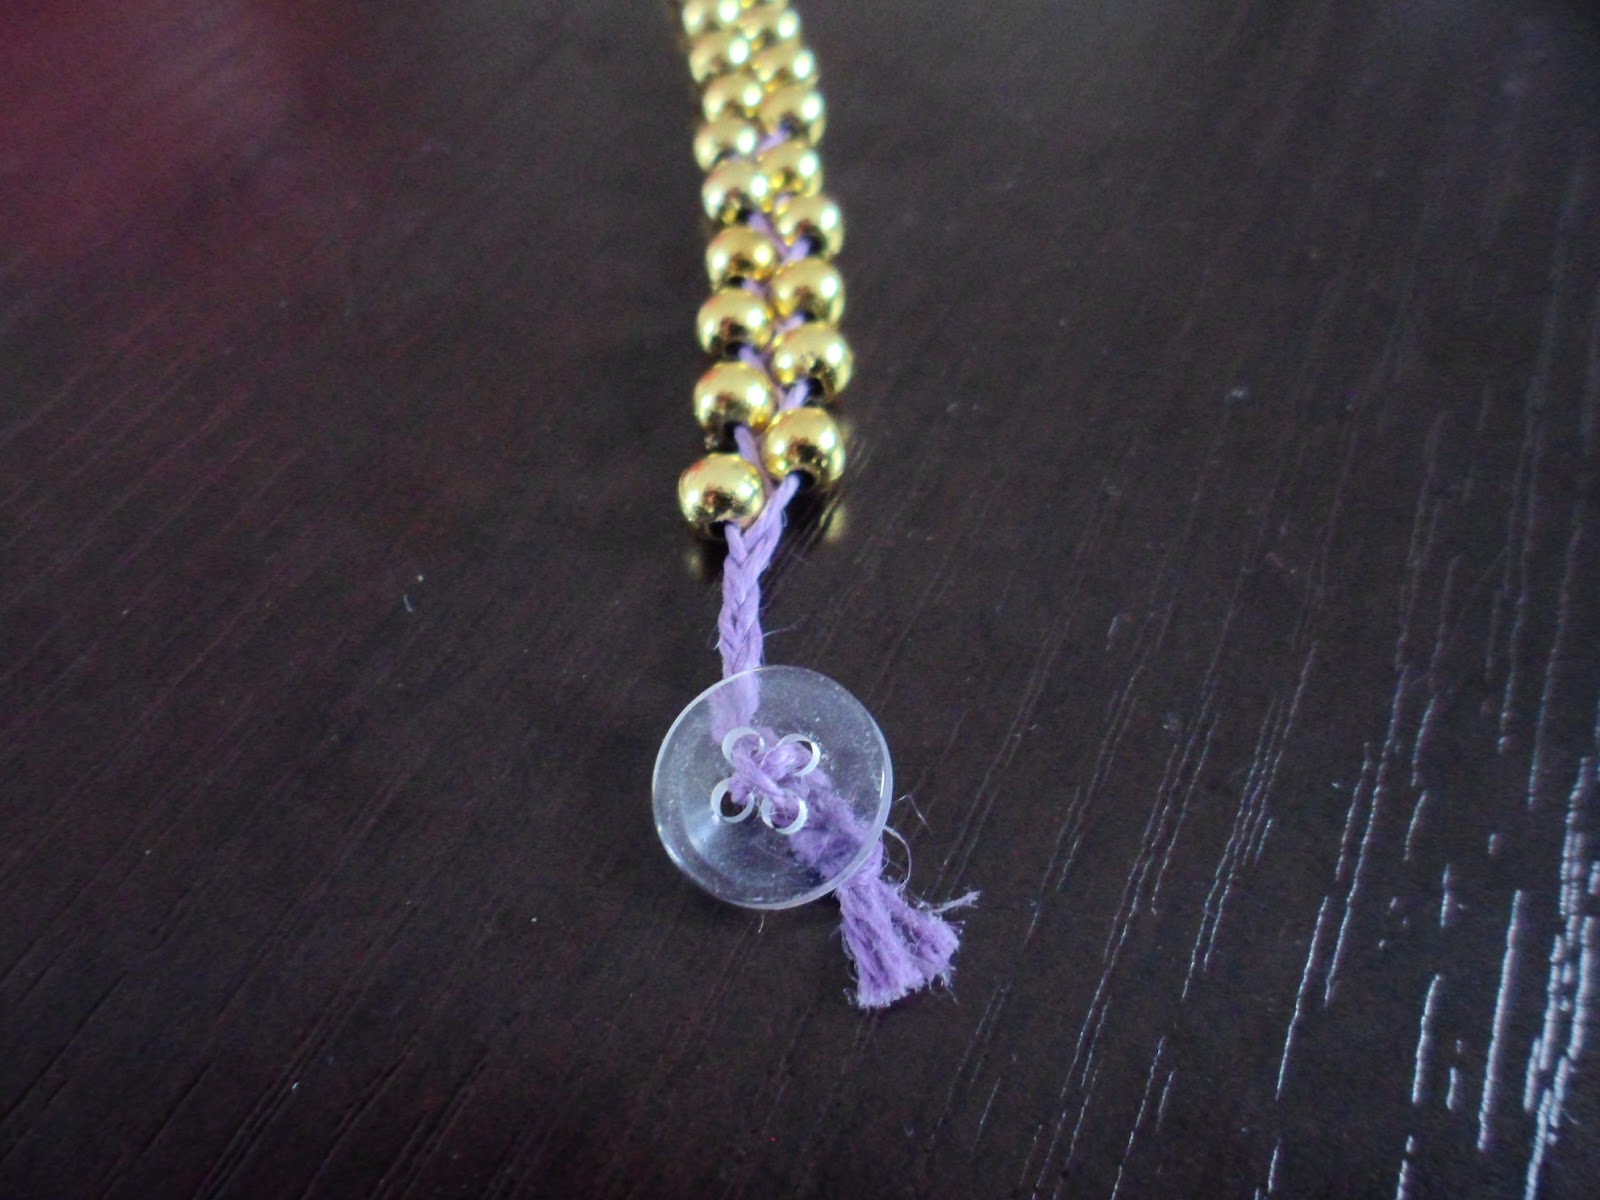
DIY Stackable Braided Beaded Bracelets [Super Easy!]

If you would like to watch the video tutorial of these bracelets just click here!

What you will need;
  • Beads - any size or style you prefer, get as creative as you like!
  • One 26 Inch and one 19 Inch piece of hemp cord - again be as creative with colors as you like!
  • A button
  • Also you might want to have on hand some tape, scissors, and some sort of measuring device


Begin by folding the 26 Inch piece of thread in half, forming a loop. Align one end of the shorter 19 Inch strand with the two ends of the longer strand, creating two parallel loops.

Tie a knot approximately a half inch from the top of the loops (note this loop must be big enough to fit around your button, but small enough so that the bracelet is not falling from your wrist).
Snip off the fourth shorter strand, leaving yourself with three equal strands to work with. 

Secure your cord to a flat surface using some tape (you will find it much easier to work this way once you begin beading).
Begin by doing a simple braid (approximately an inch an a half - but this is completely up to you depending how on many beads you would like to use).

Now you can begin adding your beads into the mix. Thread a bead onto the outer most strand that is needing to be braided next. Push the bead up against the braid and cross the strand over to the middle as you normally would. You can then thread a bead onto the opposite outer strand which is to be braided next, push it to the base of the braid and cross the strand over.

Continue threading beads on then crossing over, making sure to keep the braid tight (I recommend using one finger to hold the last bead in its place - see video linked above for a more detailed view).

The further you get with your beads, the easier it becomes to keep the bracelet tight and in order - this does all take practice but is very easy once you get the hang of it!

Finish the bracelet off with another inch or so of normal braiding (ensuring at this stage you measure it against your wrist for proper length).
Then thread your button onto the strands once you feel you've braided enough - thread the strands through the button holes. Tie several small, and then one final secure knot at the back of the button. Trim the ends. 

And your bracelet is finished!
I suggest making these in all sorts of colors so you can mix and match them easily with all your other jewelry! 


xo, Hannah


Thursday, 8 March 2012

Spring Fresh Makeup Tutorial


-Products Used-

Face:
Maybelline dream mouse foundation
Garnier anti dark circle roller
Hard Candy glamouflage concealer
Maybelline dream bouncy blush in pink plum
Nars laguna bronzer
Hard Candy tiki bronzer (for highlight)

Eyes:
Mac paint pot in painterly
Coastal Scents e/s palette
NYX jumbo eye pencil in milk
Urban Decay Ammo palette (grifter & polyester bride)
Loreal lineur intense carbon black
Maybelline eyestudio gel liner in blackest black
Covergirl lash blast 24hr


xoxo, Hannah

Friday, 27 January 2012

Eye Tutorial Perfect for Valentines Day


Products Used;

Urban decay primer potion (eden)
Urban decay e/s Last call (from Ammo Palette) 
Mac e/s Cork
Mac e/s Mylar
Mac e/s Sketch
Mac e/s Black Tied
Nyc waterproof eye pencil (dark brown)
Loreal Lineur Intense (carbon black) 
Maybelline illegal length mascara (very black)

Brushes Used;

Sparesource Crease brush 
Elf blending brush
Elf eyeshadow C brush
Coastal Scents angled eyeliner brush


xoxo 
Hannah

Friday, 10 June 2011

Everyday Neutral Eye


Products Used

Face;
Rimmel Fix and Perfect Primer
Garnier Skin Renew Anti Dark Circle Roller 
Bourjois Mineral Mousse Foundation
Maybelline Dream Mousse Concealer 
Nars Laguna Bronzer
Wet and Wild Blush in Mellow Wine 

Eyes;
Urban Decay Primer Potion in Eden
Mac Painterly Paint Pot
Grain e/s
Espresso e/s
Cork e/s
Mulch e/s
L'oreal e/s from Kerry's Bronzes Quad e/s #2 
L'oreal Lineur Intense in Rock Brown
Maybelline Eyestudio Gel Liner in Blackest Black
Covergirl Lash Blast Volume