Pages

Tuesday, 15 May 2012

Nail of the Day - Revlon Blues Combo

Seeing Revlon polish on sale is a really great way to coax me into spending some of my pocket change - that's what happened today when I saw them for $3.99CAD at my local drug store. I of course ended up with quite a few (I plan on doing a nail polish haul asap), but this is just two I snatched up that I couldn't resist doing a nail look on immediately after getting home. 

(Natural lighting)
I am a huge Revlon polish fan, I personally find them to be great quality, affordable and accessible. They also have a great range of shades that a lot of other lower end brands don't. 

(Natural lighting - Blue Lagoon)
I could not resist this light blue color, it was calling my name as soon as I saw the rack. I also only have one other blue that is in this same shade range, but this one is not completely opaque - it does have very (very) fine milled shimmer to it, so fine I could not even manage to get a clear photo of it. It seems to just add a little something to the polish, and catches the light nicely. 

(Natural lighting - Radiant)
This glitter polish is also amazing - made up of a couple varying sizes of glitter with slight hints of silver and green as well. It does have a very light blue base to it so it isn't just clear polish plus shimmer. I applied it over 'Blue Lagoon' which saved me doing more than one coat, but I think this would turn out nicely on bare nails with two good coats for full coverage. I'm hoping this is also not too hard to remove.


Let me know your favorite Revlon polish - I think these might move to the top of my list! 


xo, Hannah

Monday, 14 May 2012

Get Ready With Me: Taupe Smokes


Products I Used

Eyes
- Urban Decay Primer Potion (eden)
- Maybelline Color Tattoo Eyeshadow (tough as taupe)
- MAC e/s (copperplate)
- MAC e/s (quarry)
- MAC e/s (naked lunch)
- MAC e/s (mylar)
- Naked Palette 1 e/s (sidecar)
- Loreal Carbon Black Liner
- Loreal Voluminous Carbon Black Mascara

Face
- Nars Laguna Bronzer
- Rimmel Blush (peach sorbet)

Lips
- Revlon l/s Soft Nude


Hope you guys like this look,

xo, Hannah

Saturday, 12 May 2012

DIY Stackable Braided Beaded Bracelets [Super Easy!]

If you would like to watch the video tutorial of these bracelets just click here!

What you will need;
  • Beads - any size or style you prefer, get as creative as you like!
  • One 26 Inch and one 19 Inch piece of hemp cord - again be as creative with colors as you like!
  • A button
  • Also you might want to have on hand some tape, scissors, and some sort of measuring device


Begin by folding the 26 Inch piece of thread in half, forming a loop. Align one end of the shorter 19 Inch strand with the two ends of the longer strand, creating two parallel loops.

Tie a knot approximately a half inch from the top of the loops (note this loop must be big enough to fit around your button, but small enough so that the bracelet is not falling from your wrist).
Snip off the fourth shorter strand, leaving yourself with three equal strands to work with. 

Secure your cord to a flat surface using some tape (you will find it much easier to work this way once you begin beading).
Begin by doing a simple braid (approximately an inch an a half - but this is completely up to you depending how on many beads you would like to use).

Now you can begin adding your beads into the mix. Thread a bead onto the outer most strand that is needing to be braided next. Push the bead up against the braid and cross the strand over to the middle as you normally would. You can then thread a bead onto the opposite outer strand which is to be braided next, push it to the base of the braid and cross the strand over.

Continue threading beads on then crossing over, making sure to keep the braid tight (I recommend using one finger to hold the last bead in its place - see video linked above for a more detailed view).

The further you get with your beads, the easier it becomes to keep the bracelet tight and in order - this does all take practice but is very easy once you get the hang of it!

Finish the bracelet off with another inch or so of normal braiding (ensuring at this stage you measure it against your wrist for proper length).
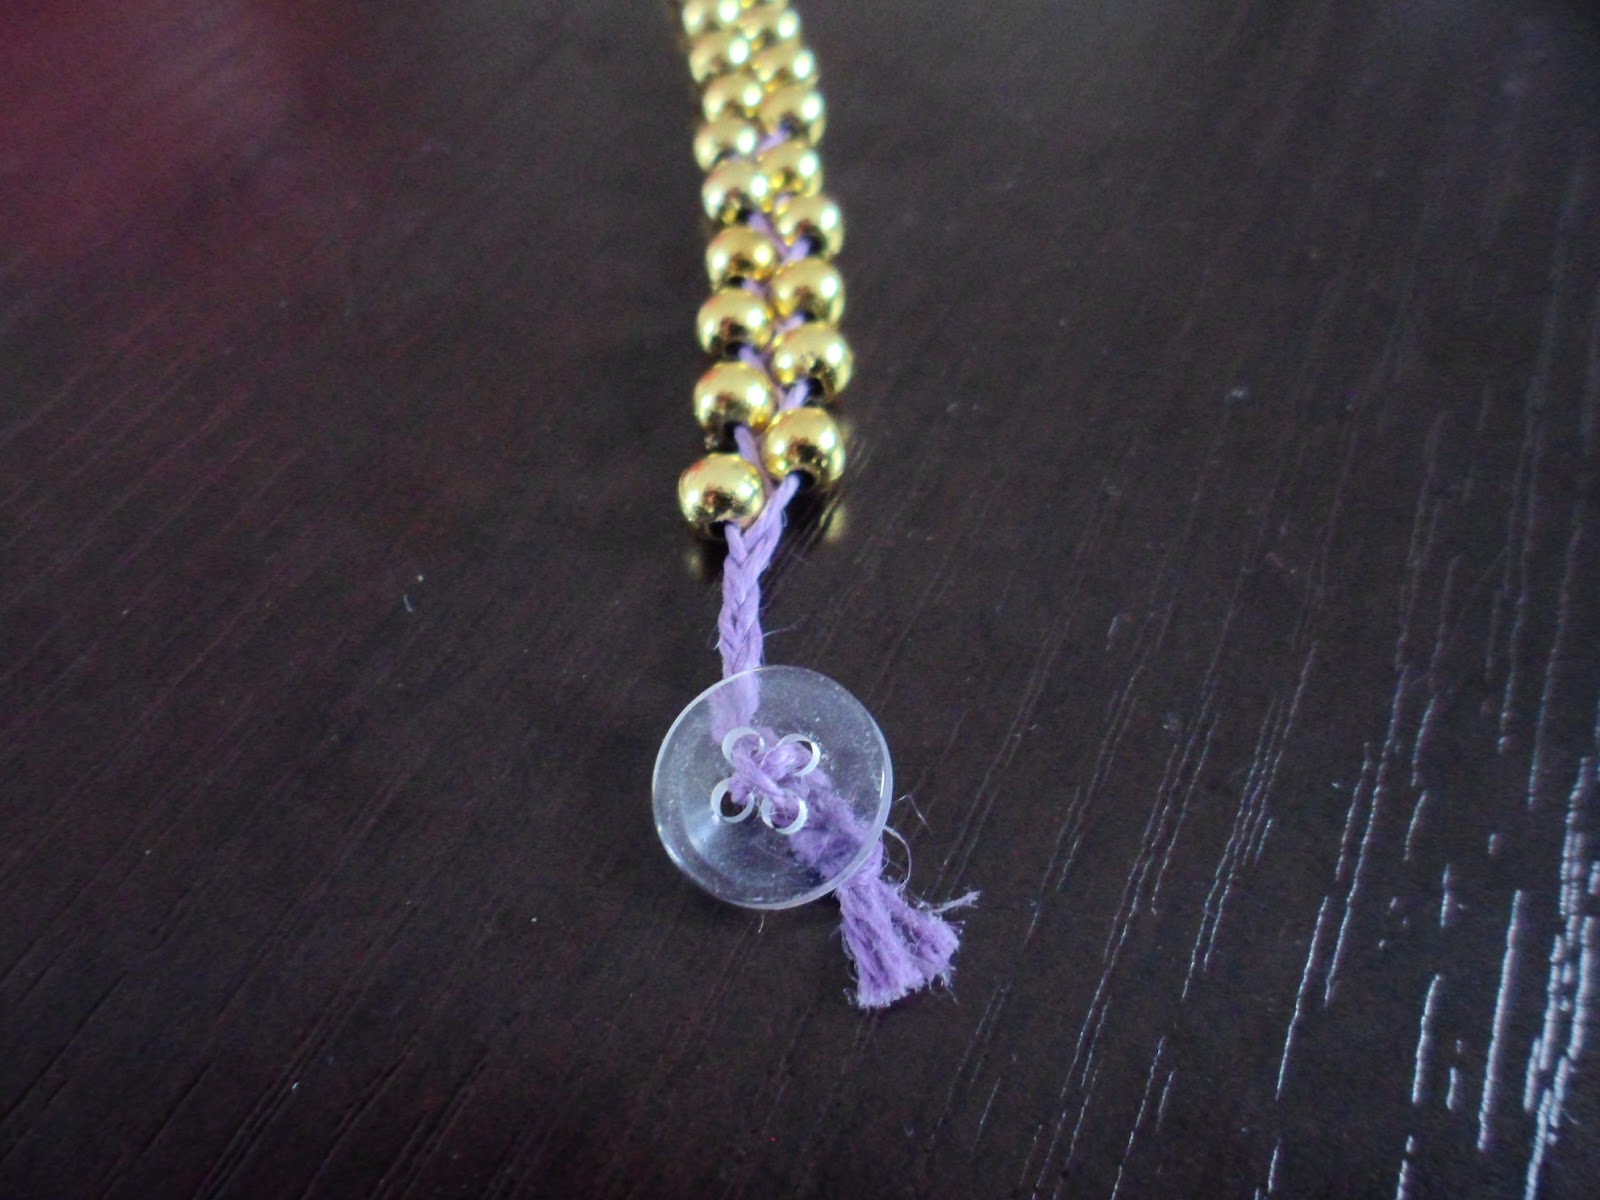
Then thread your button onto the strands once you feel you've braided enough - thread the strands through the button holes. Tie several small, and then one final secure knot at the back of the button. Trim the ends. 

And your bracelet is finished!
I suggest making these in all sorts of colors so you can mix and match them easily with all your other jewelry! 


xo, Hannah


Thursday, 10 May 2012

New Blush in My Collection - MAC Melba Swatches & Review

I've always been a fan of blush, lately this has become much more obvious though as I have begun to try and expand my collection as I felt I hadn't added anything new in quite a while. First I added a Rimmel blush which I found for a lovely price at my local drug store (I speak about it here). 
Obviously there was an itch still needing to be scratched so I looked to the internet for a cult favorite that I should be ashamed to not own - I found Melba. 
It is a highly popular blush among bloggers and vloggers alike, and certainly something I've always been missing without even knowing it. 


It is exactly the color I love in blush that makes me have the ability to wear it every day, and really, throughout the entire year as well.

It is a lovely natural peachy shade which adds a glow to pretty well any skin tone - very easily I might add, because, if any of you have never owned a MAC blush, it does not take a heavy hand to get some great color pay off. 
(Left is the blush swatched, Right is the same swatch blended into the skin) 

Please feel free to inform me of your must have blushes, I love hearing about great products, and I also love shopping for them (obviously..). 


xo, Hannah

Monday, 7 May 2012

New to my Collection - MAC Paint Pot in Bare Study

Long before I had ever owned, or even new truly what MAC Paint Pot's were about, even long before I began making my own youtube videos, I saw many a tutorial including these. There was also no shortage of raving regarding this product as well. So when I finally made a purchase at MAC that wasn't simply an eyeshadow, I of course went for a Paint Pot (Painterly). 
I've had my beloved Painterly for quite a while now, and can honestly say I use it nearly every day. I decided it was time to branch out and try another Paint Pot, thus came the purchase of 'Bare Study' - another product I've heard spoken about more than a couple of times. 

I am super happy I decided to try this one out - it suits many of my daily makeup looks perfectly - being that it is a neutral, shimmery champagne color. This is the kind of product you can easily apply to your eye in seconds, toss on a bit of mascara and run off to do whatever it is you need to do as well (it's not just an amazing base color). 

(Natural lighting) 

I find the color extremely similar to 'Naked Lunch', which we all know is a MAC staple shadow that is known and loved by many. 

This product is marketed essentially as a cream shadow/base - some argue that some sort of eye primer should be used below these, as they are not truly that effective as a base for eyeshadows alone, and will tend to crease. I myself find there to be no problem using these as both base and "primer" in one. My skin is not particularly oily however, if yours is than this is where you may run into problems and require a little something extra. 

I am now completely ready to spend the $21 CAD on another couple of these beauties, and trust me, I have my eyes on a couple of my next potential loves. 

Let me know if you've tried any of these, and if you haven't yet, let me know if you'd be interested in doing so! 

xo, Hannah